

Your cookies are burning on the outside while staying raw in the middle. Your roast needs 30 extra minutes every time. The display says 375°F, but something is clearly wrong. An oven that refuses to hold the correct temperature is one of the most frustrating appliance problems a homeowner can deal with, because the symptom is subtle enough that you keep questioning yourself before you finally decide to investigate. This guide will walk you through every diagnostic step in the correct order, tell you exactly what a passing or failing result looks like, and give you honest cost figures for each repair so you can decide confidently whether this is a DIY fix or a job for a technician.
Is Your Oven Actually Off-Temperature? Start With This Free Test
Before you pull anything apart, confirm that the oven is genuinely reading the wrong temperature and not just cycling normally. Electric and gas ovens both cycle their heat source on and off to maintain a set point, so the temperature inside swings above and below the target by roughly 25°F in either direction during normal operation. That is not a defect. The question is whether the average temperature is significantly above or below the dial setting.
The fastest confirmation tool costs between $6 and $15: a standalone oven thermometer hung from the center rack. Set your oven to 350°F, let it preheat fully (at least 20 minutes after the preheat chime, not just until the beep sounds), then read the thermometer without opening the door. Check it again 10 minutes later. If both readings are within 25°F of 350°F, your oven is performing normally and the problem is likely a recipe calibration issue, not a parts failure. If the readings are consistently 50°F or more off target, you have a real problem worth diagnosing.
Time estimate: 25 to 30 minutes. Cost: $0 if you already own a thermometer; $6 to $15 to buy one.
One more quick check before moving on: many modern ovens have a built-in temperature calibration offset in the settings menu. On most GE, Whirlpool, and Samsung ranges, you can hold the Bake button for 5 to 8 seconds to access a calibration mode that lets you shift the set temperature up or down by up to 35°F. If your oven is only 25 to 35°F off, adjusting this offset takes two minutes and costs nothing. If the offset is already maxed out, or the oven is 50°F or more off, you have a hardware problem and the steps below are where you need to go next.
Step 1: The Oven Thermometer Calibration Check (Under 15 Minutes)
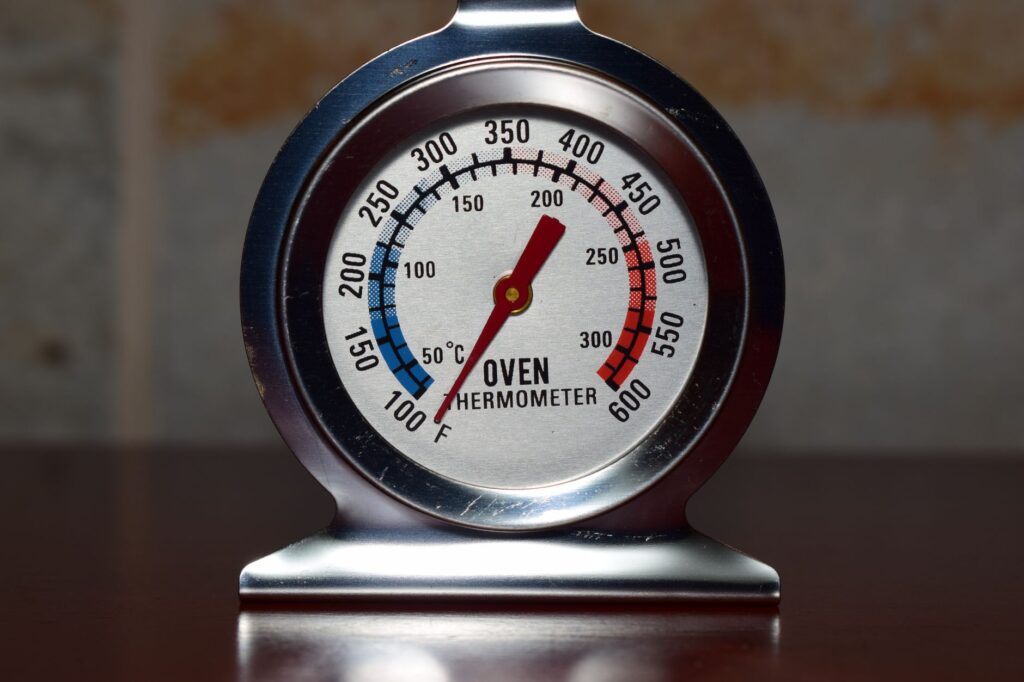
Run a proper preheat-and-measure cycle to get a reliable baseline reading before touching any components. A single check the moment the preheat chime sounds is not enough — the oven is still actively cycling at that point and the temperature inside has not yet stabilized.
How to Run the Test Correctly
1. Place your oven thermometer on the center of the middle rack, away from the walls and the back of the oven cavity.
2. Set the oven to exactly 350°F in bake mode (not convection, which uses a fan that affects readings).
3. Wait for the preheat chime, then let the oven continue heating for an additional 15 to 20 minutes without opening the door.
4. Read the thermometer through the oven window if possible. If you must open the door, do it quickly and re-check in 5 minutes.
5. Take three readings spaced 5 minutes apart. Average them. That average is your actual operating temperature.
What Your Reading Means
Within 25°F of target: Normal cycling variation. Check the calibration offset in the settings menu before doing anything else.
25 to 50°F off: Borderline. Try the calibration offset first. If the offset is already adjusted and the oven is still off, move to Step 2.
More than 50°F off: A hardware component has failed. Work through Steps 2, 3, and 4 in order.
Oven runs significantly hot (50°F+ above target): This almost always points to a failed temperature sensor probe sending a false low reading to the control board, causing it to keep heating. Go directly to Step 3.
Step 2: Inspect the Bake Element — What Damage Looks Like
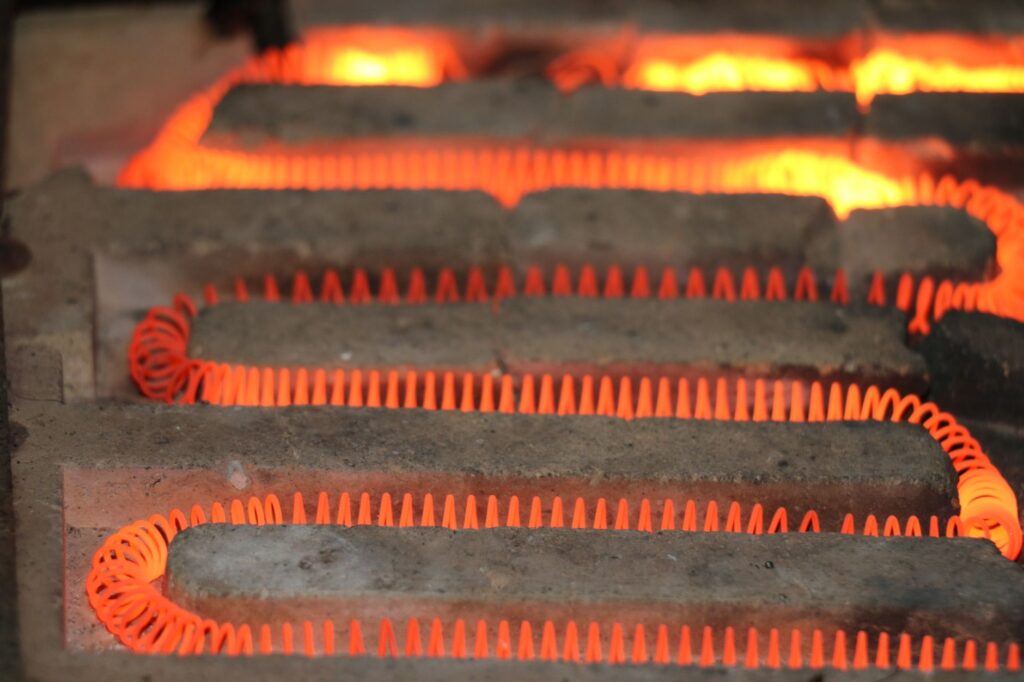
On an electric oven, the bake element is the coiled heating rod at the bottom of the oven cavity. When it fails, the oven either heats very slowly, never reaches temperature, or heats unevenly from top to bottom. The good news: this is the easiest component to visually diagnose, and replacement is one of the most straightforward appliance repairs a homeowner can do.
Visual Inspection (Power Off, Oven Cool)
Turn the oven off, unplug it from the wall or shut off its dedicated breaker, and let it cool completely before reaching inside. Then look at the bake element closely under good lighting. You are looking for:
Visible burn holes or blistering: The element surface will show a spot where it literally burned through, often with dark charring or a blister on the metal. This is a definitive failure. The element needs replacement.
Cracks or splits in the element body: A crack in the heating coil breaks the circuit. The most common problems with heating elements include cracking and splitting, neither of which are repairable. The whole element must be replaced.
Areas that do not glow during a bake cycle: If you run the oven briefly and the element glows orange in some spots but stays dark in others, part of the coil has failed. Other signs that you may need heating element repair include the element not glowing bright orange when the oven is on, or food not cooking all the way through.
No visible damage: A visually clean element can still have failed electrically. If the oven runs cold and the element looks fine, use a multimeter to test for continuity. Set it to the resistance (ohms) setting and touch the probes to each terminal on the element. A healthy bake element on most standard ranges reads between 20 and 60 ohms. An open circuit (no reading, or “OL” on a digital meter) means the element has internally failed even without visible damage.
Bake Element Replacement: DIY or Pro?
On most freestanding electric ranges, replacing the bake element is a reasonable DIY job. The element is held in place by two screws at the back wall of the oven cavity, and the wires connect with spade terminals you can pull off by hand. Part numbers to look up: Whirlpool/Maytag bake elements commonly use part number WPW10408179 for many popular models; GE uses WB44T10010 on a wide range of ranges. Always confirm against your model number before ordering. Standard bake elements for most freestanding electric ranges typically cost $30 to $70 for the part alone. With labor from a technician, oven bake element replacement pricing runs $100 to $250, with parts costing $50 to $150 and labor $50 to $100, depending on the oven model and brand.
If the element looks and tests fine, move to Step 3. The temperature sensor probe is the next most likely cause of an oven running off-temperature.
Step 3: Test the Temperature Sensor Probe with a Multimeter
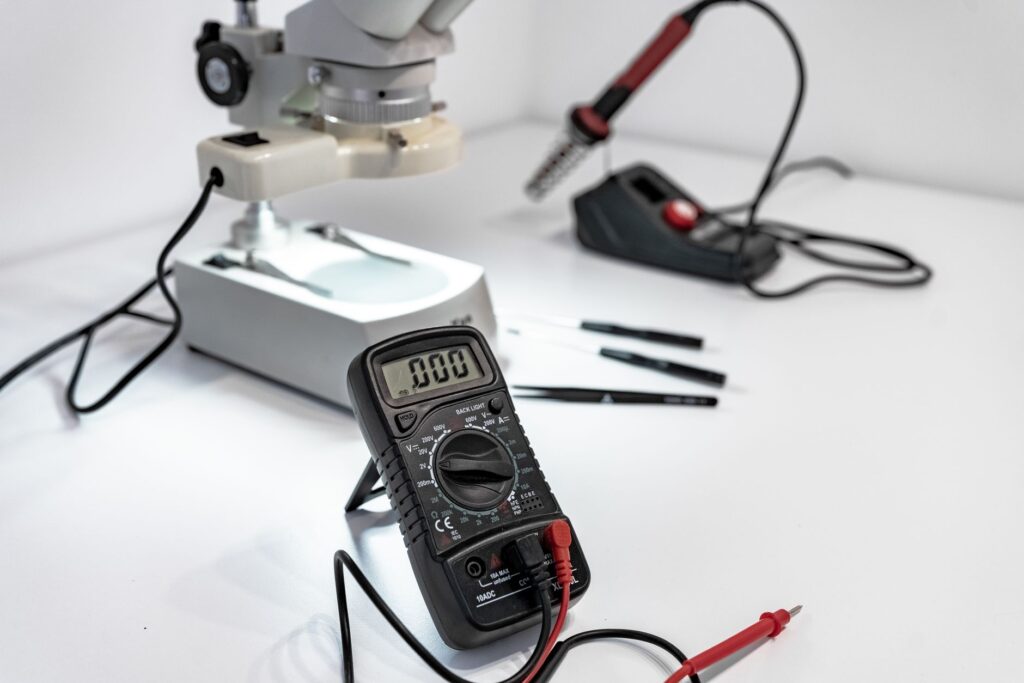
The temperature sensor, also known as the oven temperature sensor assembly, is usually found at the back of the oven cavity. Its function is to measure the temperature inside the oven while it is on and send that reading back to the electronic control, which adjusts heating as necessary. When this probe fails or drifts out of spec, the control board gets a false temperature signal and either overheats or underheats the oven accordingly.
Over time, the oven temperature probe can fail or become inaccurate due to wear and tear, exposure to extreme temperatures, or damage from cleaning and handling. It is one of the most common causes of an oven that runs consistently hot or cold without any visible element damage.
How to Test the Sensor
You will need a digital multimeter. If you do not own one, a basic model costs $15 to $25 at any hardware store and is worth having for appliance diagnostics.
1. Unplug the oven or shut off its breaker. This is not optional. Do not skip this step.
2. Locate the sensor probe. Most oven sensors have a mounting plate attached to the rear wall of the oven cavity interior, held in place by two screws that go through it into the rear oven liner. Remove those two screws and gently pull the probe forward into the oven cavity.
3. Disconnect the wiring harness connector. There should be a plastic terminal block on the wires that may need to be manipulated to get it through the hole in the rear of the oven cavity. Once through, the connector can be disconnected to access the sensor wire terminals.
4. Set your multimeter to the ohms (resistance) setting and touch one probe to each metal terminal on the sensor connector.
5. Read the result at room temperature (around 70°F). The resistance of the sensor should read approximately 1,080 to 1,090 ohms at room temperature. The most common temp sensors used today are approximately 1,000 to 1,100 ohms resistance at room temperature (70°F).
6. Interpret the result using the table below.
| Multimeter Reading at Room Temp (~70°F) | What It Means | Next Step |
|---|---|---|
| 1,050 – 1,110 ohms | Sensor is within normal spec | Move to Step 4 (control board) |
| Below 900 ohms | Sensor reading too low — control board over-fires the element, oven runs hot | Replace the sensor probe |
| Above 1,200 ohms | Sensor reading too high — control board under-fires the element, oven runs cold | Replace the sensor probe |
| “OL” / open circuit / no reading | Sensor has failed completely — no signal reaching control board | Replace the sensor probe immediately |
| Reading fluctuates wildly | Intermittent internal failure or damaged wiring harness | Replace sensor; inspect harness wiring for chafing or corrosion |
If the actual resistance that you measure through the oven temperature sensor is off by more than 100 ohms, you will likely need to replace the temperature sensor. If the sensor tests fine and is within spec, the issue is likely with the electronic control board.
Sensor Replacement Cost
Replacement sensor probes for most major brands (GE, Whirlpool, Samsung, LG, Frigidaire) run $15 to $45 for the part. It is a two-screw swap that most homeowners can complete in under 30 minutes. The total cost to fix an oven sensor with a technician runs $100 to $250, including the part and labor, or more with OEM parts and wiring work.
Step 4: When It Points to the Control Board
If your bake element is intact, your sensor probe tests within spec (1,050 to 1,110 ohms), and the oven is still running off-temperature, the control board is the likely culprit. This is the last stop in the diagnostic chain, not the first, because control boards are expensive and replacing one unnecessarily is a costly mistake.
The oven control board is a printed circuit board that acts as the oven’s brain. It receives signals from the temperature knob or digital panel, decides when to fire the bake or grill elements, and monitors safety sensors. In a typical electric oven, the board also powers the clock, timer, and self-clean cycle.
Signs the Control Board Has Failed
Control board failure stops the oven from turning on or off and shows error codes on the display. In the specific case of off-temperature baking, the board may be sending incorrect voltage signals to the element relay even though the sensor is reporting an accurate temperature. Other symptoms that point to the board include: the oven heating correctly on Broil but not on Bake, the preheat cycle running for an unusually long time before any heat is detected, or the oven shutting off before reaching the set temperature without any error code.
On Whirlpool and Maytag ranges, an F3 or F4 error code specifically relates to the sensor circuit. While the sensor probe itself is most often the cause of an F3 or F4 fault code, it is not a certainty. A problem in the wiring harness between the control and the sensor, or the electronic control itself, could each result in the same error codes being displayed. It will be necessary to isolate which is the actual cause of the fault condition in order to correct it.
Control Board Replacement: Proceed Carefully
Before ordering a control board, do two things. First, inspect the wiring harness that runs between the sensor and the board. A chafed wire rubbing against the oven frame can mimic a failed board perfectly. Second, confirm the error codes against your specific model’s service manual, which most manufacturers publish online. Control boards are expensive and delicate. Testing one incorrectly can damage it further.
Oven control board replacement costs $150 to $600 installed. A new control board costs $60 to $250 for the part alone. On higher-end brands like Bosch, Wolf, or Samsung with advanced digital interfaces, the part cost alone can exceed $300. If the oven is less than 10 to 12 years old and the replacement cost stays under $300, repair usually makes sense. New mid-range electric ovens start around $1,200, so a repair well under that threshold can be a better deal.
Gas Oven Running Cold? Don’t DIY This One
Everything in Steps 1 through 3 above applies to gas ovens in terms of checking the temperature and testing the sensor probe. But when the diagnostic trail leads to the igniter, the gas valve, or the burner assembly, the rules change completely. This is the firm DIY line for gas appliances.
A gas oven that runs cold almost always has one of two causes: a weak or failed igniter that cannot generate enough heat to fully open the gas valve, or a gas safety valve that has failed and is restricting flow. Even though igniters look simple, they draw electrical current while controlling gas flow. A weak or miswired igniter can delay ignition or allow gas to accumulate. This is not a DIY fix.
Carbon monoxide can be produced by improper oven repair, and this is especially dangerous if your home lacks a CO detector. Never ignore a gas smell. Leave the area immediately and call your gas company or local emergency line.
If you have a gas oven and the thermometer test in Step 1 confirms it is running significantly off-temperature, and the sensor probe in Step 3 tests within normal ohm spec, call a licensed technician. Do not proceed to disassemble the burner assembly or gas valve yourself. The risk is not theoretical, and no recipe or repair cost justifies it.
What These Repairs Cost in 2026
Here is an honest summary of what each repair path costs, whether you do it yourself or hire a technician in the DFW area. Parts prices are for aftermarket components; OEM parts from the manufacturer typically run 20 to 40 percent higher.
| Component | DIY Part Cost | Installed (Parts + Labor) | DIY Difficulty |
|---|---|---|---|
| Oven thermometer (diagnostic tool) | $6 – $15 | N/A | Easy |
| Temperature sensor probe | $15 – $45 | $100 – $250 | Easy (2 screws) |
| Bake element (freestanding range) | $30 – $70 | $100 – $250 | Easy to moderate |
| Control board | $60 – $250 | $150 – $600 | Moderate (call a pro if oven is under warranty) |
| Gas igniter / gas valve | Not recommended for DIY | $150 – $400 | Pro only |
The honest repair-vs-replace threshold: if the repair cost exceeds 50% of the current replacement value of an appliance that is already more than 10 years old, replacement usually wins. A $400 control board repair on a 13-year-old range that costs $700 to replace new is a very poor investment.
When to Stop Troubleshooting and Call a Pro
Here is the honest decision matrix. Call a technician if any of these conditions apply to your situation.
You Have a Gas Oven
As covered above: sensor testing is safe for gas ovens, but anything involving the igniter, gas valve, or burner tube requires a licensed technician. If a gas oven not heating up is paired with burners that also will not light, the issue may go beyond the igniter. In those cases, gas oven repair should be handled by a professional due to safety risks.
Your Oven Is Still Under Manufacturer Warranty
DIY repairs can lead to a voided warranty, meaning you would be financially responsible for any future repairs that might have been covered. If your oven is less than one year old (or up to five years old for certain premium brands with extended parts warranties), call the manufacturer’s service line first. A tech visit may cost you nothing.
The Control Board Is the Suspected Cause
Replacing a control board is not technically difficult, but misdiagnosing the problem and buying a $200 board when the real issue was a $12 wiring connector is an expensive lesson. A technician with a proper diagnostic kit can confirm board failure definitively before any parts are ordered. At Clear Services Appliance Repair, our diagnostic fee is waived when you proceed with the repair, so you pay for answers only when we fix the problem.
The Oven Is a Built-In Wall Oven
Built-in wall ovens require partially removing the unit from its cabinet enclosure to access the rear wiring harness and, in some cases, the sensor connector. If the sensor mounting screw heads are not visible from inside the oven cavity, the back panel of the range or oven may need to be removed to access the sensor mounting and harness connector to test and replace it. On a built-in oven, that may involve removing the appliance from its enclosure. That is a job that benefits from a second set of hands and professional tools.
You Are in Frisco, Plano, Allen, McKinney, or Anywhere in Collin County
If you have worked through these steps and confirmed a failed sensor, bake element, or control board but would rather have it done right the first time, we can help. At Clear Services Appliance Repair, we are your neighbors — we live and work in Collin County. Call us at 469-318-9918 before noon Monday through Saturday for same-day service. Text us a photo of your model and serial number plate so we arrive with the right parts already on the truck. No second trip, no waiting on parts. Every repair is backed by our 90-day parts and labor warranty.
Have more questions about your oven or another appliance? Our team at Clear Services Appliance Repair is here to help — reach out any time and we will walk you through what we are seeing before we ever charge you a dime.
Frequently Asked Questions
How do I know if my oven temperature is actually off and not just cycling normally?
All ovens cycle their heat source on and off, causing the internal temperature to swing roughly 25°F above and below the set point. This is normal. To confirm a real problem, place an oven thermometer on the center rack, preheat to 350°F, wait 20 minutes past the preheat chime, and take three readings 5 minutes apart. If the average is more than 50°F off your set temperature, a component has failed.
What should an oven temperature sensor read on a multimeter?
At room temperature (around 70°F), a healthy oven temperature sensor probe should read approximately 1,000 to 1,100 ohms of resistance, with most common sensors landing between 1,080 and 1,090 ohms. A reading more than 100 ohms outside that range in either direction, or an open circuit with no reading at all, means the sensor needs to be replaced.
Can I replace a bake element myself?
Yes, on most freestanding electric ranges this is a straightforward DIY repair. Turn off the oven at the breaker, let it cool completely, remove two screws at the back wall of the oven cavity, pull the element forward, and disconnect the two spade wire terminals. Replacement elements for common Whirlpool and GE ranges cost $30 to $70. Always confirm the part number against your model number before ordering.
Why is my gas oven running cold but my stovetop burners work fine?
When the stovetop burners light but the oven does not heat properly, the most likely cause is a weak or failing oven igniter. Gas oven igniters draw electrical current to both glow and signal the gas safety valve to open. As the igniter ages it weakens and can no longer generate enough heat to fully open the valve, starving the burner of gas. This is a pro-only repair — do not attempt to service the igniter, gas valve, or burner assembly yourself.
Is it worth repairing an oven or should I just replace it?
As a general rule, if the repair cost exceeds 50% of the current replacement value of the oven and the appliance is already more than 10 years old, replacement usually makes more financial sense. A $45 sensor swap on a 6-year-old range is an obvious repair. A $400 control board on a 14-year-old oven that retails for $700 new is a much harder case to make.
